PROTECT YOUR DNA WITH QUANTUM TECHNOLOGY
Orgo-Life the new way to the future Advertising by AdpathwayOne thing I've always hated about 2-piece stringing is the mess you could end up with around the "Yonex loop" areas at 4/8 o'clock. As some of you might already know, I have serious tendency to being OCD when it comes to the look of the strings on the outside of the frame and for the life of me I've always struggled big time to consistently achieve the desired look. And of course: To get rid of those nasty crossovers.
So at some point I decided took look deeper into that issue and look for a simple process to eliminate it and to ensure a consistently nice look without having to care too much. The key thing is how you deal with the Yonex loop part on the outside of the frame and where you pass this loop with the main and cross strings. And behold, I found a simple and easy-to-remember rule that has proven to work really well over the past couple of months in my personal trials.
Repeat after me: Over, under, over, over!
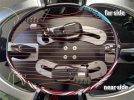
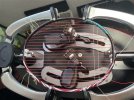
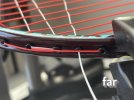
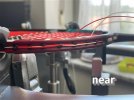
Let me show you what I mean. Let's start at the moment when the Yonex loop is created. I'll be marking the different sides of the racket in all the following pictures to make it easier to follow:
Step 1 - Main string, near side: Over the loop!
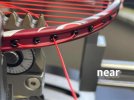
Step 2 - Main string, far side: Under the loop!
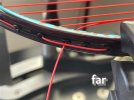
Step 3 - Cross string, near side: Over the loop!

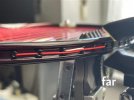
Step 4 - Cross string, far side: Over the loop!
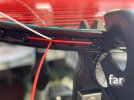
After that, the rest is pretty much self explanatory and can be different, depending on your cross starting sequence for example. The following post will show the next steps going by my personal process.
Last edited: Jul 3, 2025
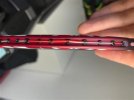
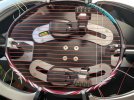
There is a chance of creating another crossover at this point depending where you pass the loop and where you pass the existing string in the following shared grommet. I'm coming out under the loop on this one because I find it easier to go under the existing main string in the next shared grommet using the awl:
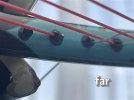
Since I'm following this simple rule, all my 2-piece jobs came out perfect and it saves me a lot of my previous frustration with doing 2-piece jobs in general. So I hope this helps others who are struggling with that exact problem.
Thanks for this tutorial! Very helpful. On this topic, how do you pass the cross string through the grommet at b10/b11 when the main string is already strung there? The grommet is blocked by the existing string. I use my awl to free a bit of space but I dont really like doing it, seems like i damage it. On the top, I use pieces of scrap string to lift it with my starter clamp, so thats not a problem, only on bottom side.
Thanks for this tutorial! Very helpful. On this topic, how do you pass the cross string through the grommet at b10/b11 when the main string is already strung there? The grommet is blocked by the existing string. I use my awl to free a bit of space but I dont really like doing it, seems like i damage it. On the top, I use pieces of scrap string to lift it with my starter clamp, so thats not a problem, only on bottom side.
I start my crosses through b10/b9 before I tie off the main string. That way, it is pretty easy to thread the cross through the already crowded b10. Just follow the sequence shown in the pictures.
Thanks... gonna try to implement it. Cheers mate
I think we are pretty much the same but I finish pulling the yonex loop thing and I clamp off but for bothsides I do Over & Over. Then I start feeding the crosses on the near side B10 I go Over then end Under and then go to B9 with enough to tie off. Then I finishup knotting both mains before I continue the crosses with another 2 lines before I start tensioning.
Far from what I was taught intially while stringing where I was told to completely finish mains then start on the farside but at B9 Over get enough string for the knot, then B10 over, preweave 2 more lines and then starting clamp doublepull. Could never seem to stop the crossing on the farside this way so gave up.
Maybe i am in the minority, but i am a fan of the crossovers - I like how they keep the longer string in the middle, tight to the frame and prevent it from moving. Of course, I understand why people don't like it, and the reason to avoid doing it but I am okay with the trade-off
I start my crosses through b10/b9 before I tie off the main string.
same.
I do under/under/over/over and get the same result. It's definitely easier to start the crosses at b9/b10 before tying off the mains.
The other thing I do is when I weave the crosses, I start at b10 and go down to b9, as that way you don't have to pull the rest of the string through. My first weave in b10 will be an over, which then makes the crosses towards the top of the racket also end with an over. This is easier to grab the string and feed into the grommets compared to when the string is underneath the racket, as I find the clamps can get in the way.











 English (US) ·
  French (CA) ·