

 22 hours ago
2
22 hours ago
2
PROTECT YOUR DNA WITH QUANTUM TECHNOLOGY
Orgo-Life the new way to the future Advertising by AdpathwayPublished July 30, 2026 01:31PM
Often in yoga, we become overly fixated on finding the shape of a pose or even managing our overwhelming emotions, such as anxiety and anger. As a result, we forget about our actual experience on the mat. Namely, we tend to focus on the welcome release in our hamstrings during Down Dog or silently cursing the teacher in Plank as we ignore the aching in our wrists.
But it’s essential to also consider the crucial role that the wrists, some of the smallest joints in our body, play in our practice. Almost everyone’s wrists are already struggling with tightness and weakness thanks to overuse from constantly typing on a keyboard and texting on phones. So by the time we attempt Down Dog, Plank, or an arm balance, we struggle.
But the issue typically isn’t a lack of overall strength. It’s a lack of strength in our wrists.
Why You Need Wrist-Strengthening Exercises
Understanding how the hands interact with the ground in certain yoga poses can protect your wrists. For example, when you flatten your hand on the mat and shift your shoulders above your wrists, as in Down Dog or Plank or Crow, it creates an approximately 90-degree angle between your hand and forearm. Research shows that if the muscles are not engaged, this position exponentially increases the load on the wrists by up to 1000 percent. In turn, this creates compression on the carpal tunnel and strains the ligaments of the hands, wrists, and forearms.
A simple yogic technique called Hasta Bandha (hand lock) can help prevent this passive collapse. It teaches actively pressing through the fingers and knuckles, especially at the base of the index fingers and thumbs. Rather than unconsciously dumping the weight of our bodies into the heels of the hands, this approach engages the muscles of the hands and forearms to more evenly distribute the body weight.
5 Wrist Strengthening Exercises for Yoga
Fortunately, building strong wrists doesn’t usually require a dramatic change in your lifestyle. By dedicating just 5 minutes to your hands and wrists, you can keep your practice pain-free.
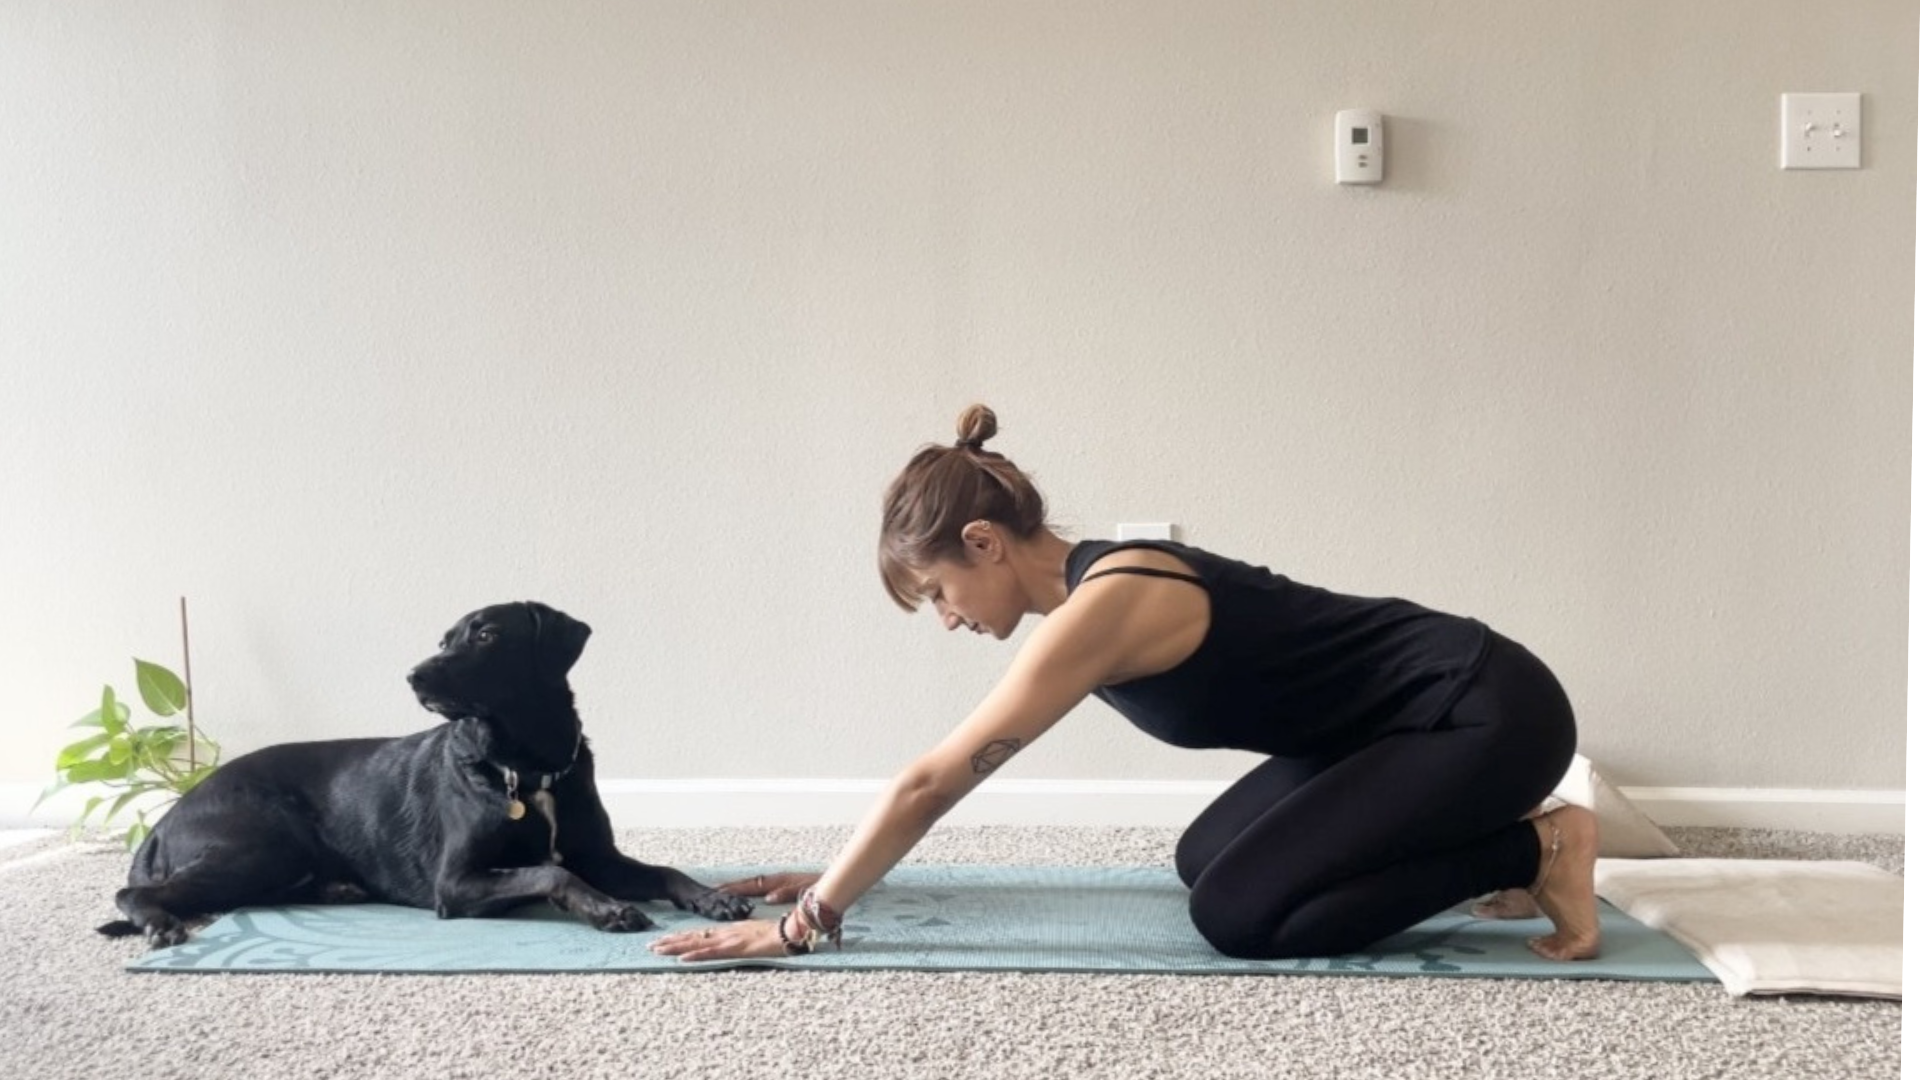
1. Tabletop Rocking
 (Photo: Anjana Rajbhandary)
This gentle movement gradually increases the load, or pressure, on the wrists, which builds tolerance for weight-bearing poses. It also stretches the muscles along the tops of the forearms that stabilize your wrists, which tend to be tight from everyday use.
How to: Begin on your hands and knees with a neutral spine and your shoulders over your hands. Spread your fingers wide and strongly press your palms flat against the mat.
 (Photo: Anjana Rajbhandary)
Slowly rock backward and sink your hips toward your heels. Then slowly rock back to the starting point. Repeat for 5–8 counts.
Focus on: The gradual shift of pressure from the base of your hands into your knuckles. Keep the base of your index fingers and thumbs glued to the mat to prevent your hands from rolling outward.
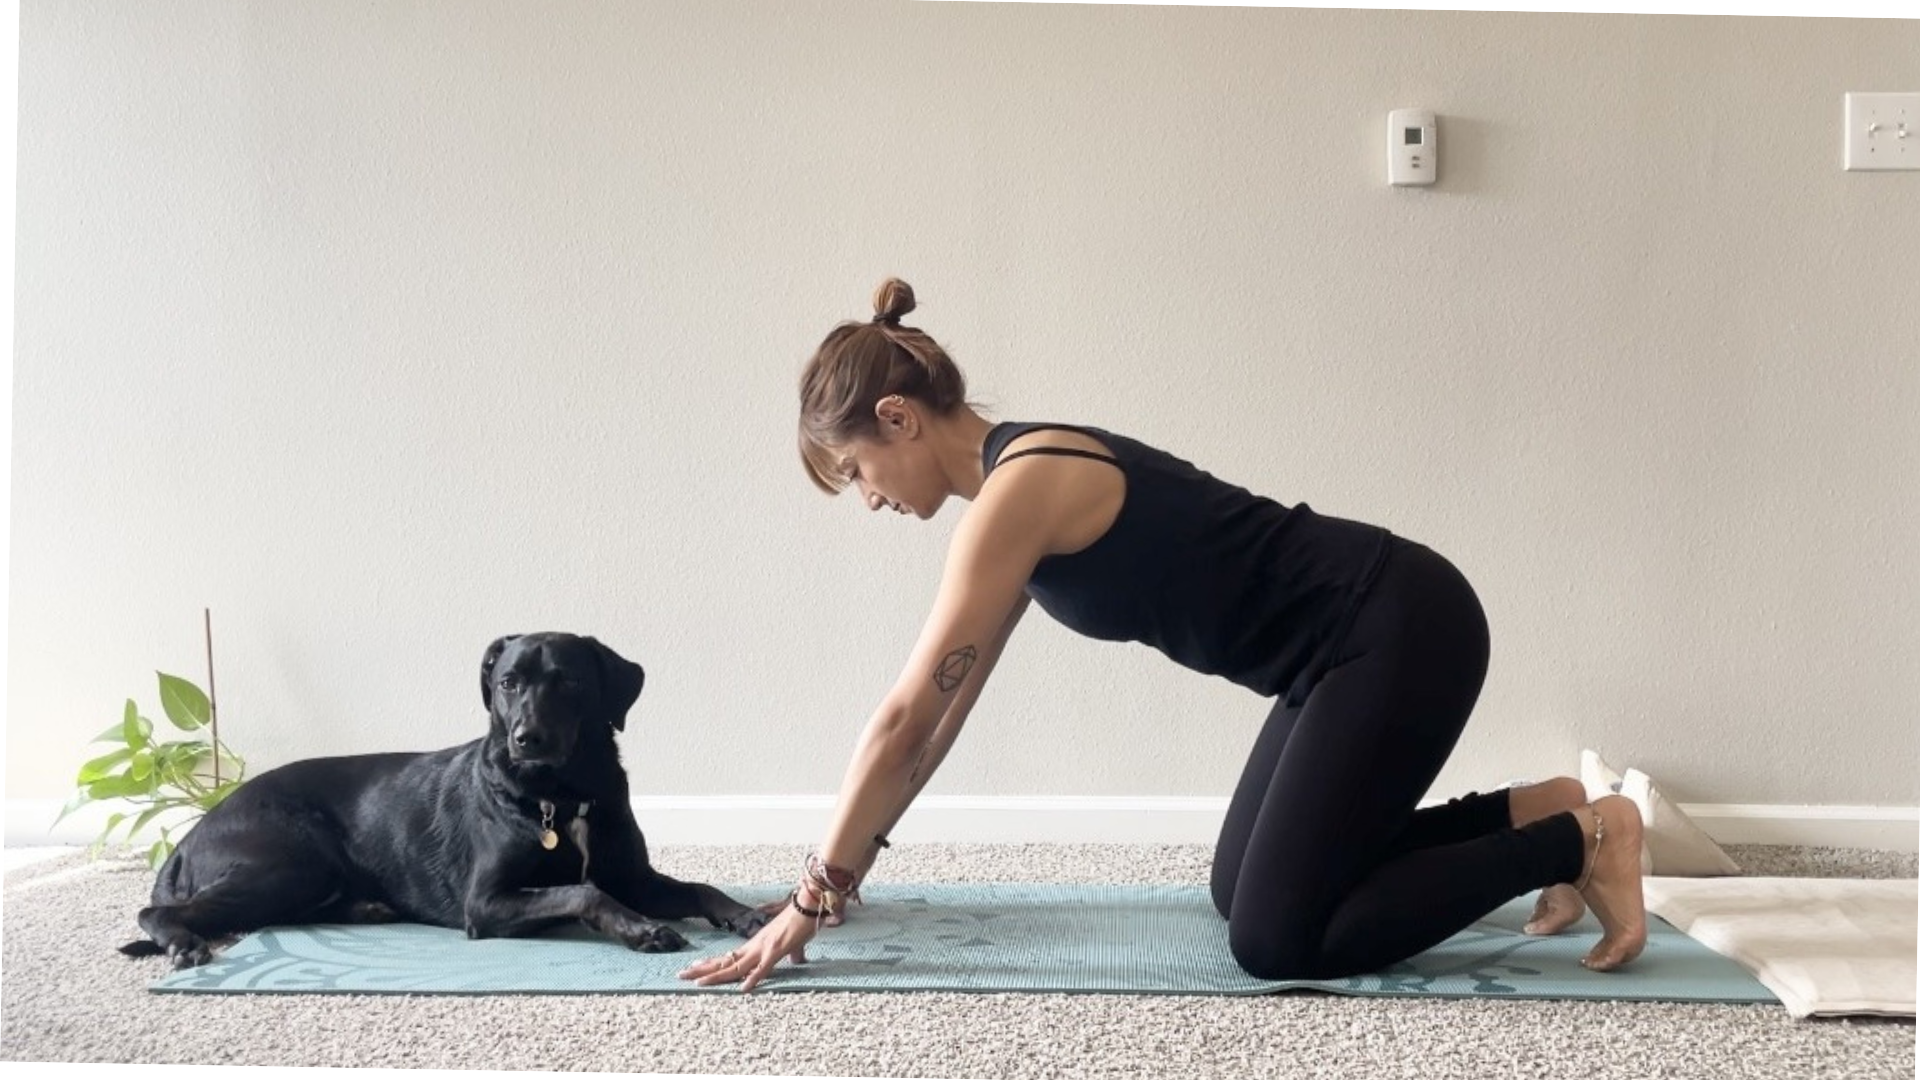
2. Active Finger Pulses
 (Photo: Anjana Rajbhandary)
This wrist exercise targets the “gripping” muscles of the hands and fingers. By keeping your fingers grounded while pulsing the palms away from the mat, you activate the muscles of the forearms that support the wrist. This not only builds the strength needed for more stable Planks, Down Dogs, and other yoga poses that ask the wrists to bear weight, it helps diffuse the load among the hands, wrists, and forearms.
How to: From hands and knees, keep your palms flat and your fingers firmly glued to your mat. First, slowly lift the heels of your hands and then your palms, while balancing on your fingers, including the knuckles at the base of the fingers. Then slowly lower the palms and the heels of your hands back down with control. Repeat this pulsing movement continuously at your own speed for 1 minute.
Focus on: The activation of your forearms. Also, avoid letting your fingers bend backward; keep them strong and slightly clawed into the mat. Notice how quickly the muscles in your hands and forearms engage.
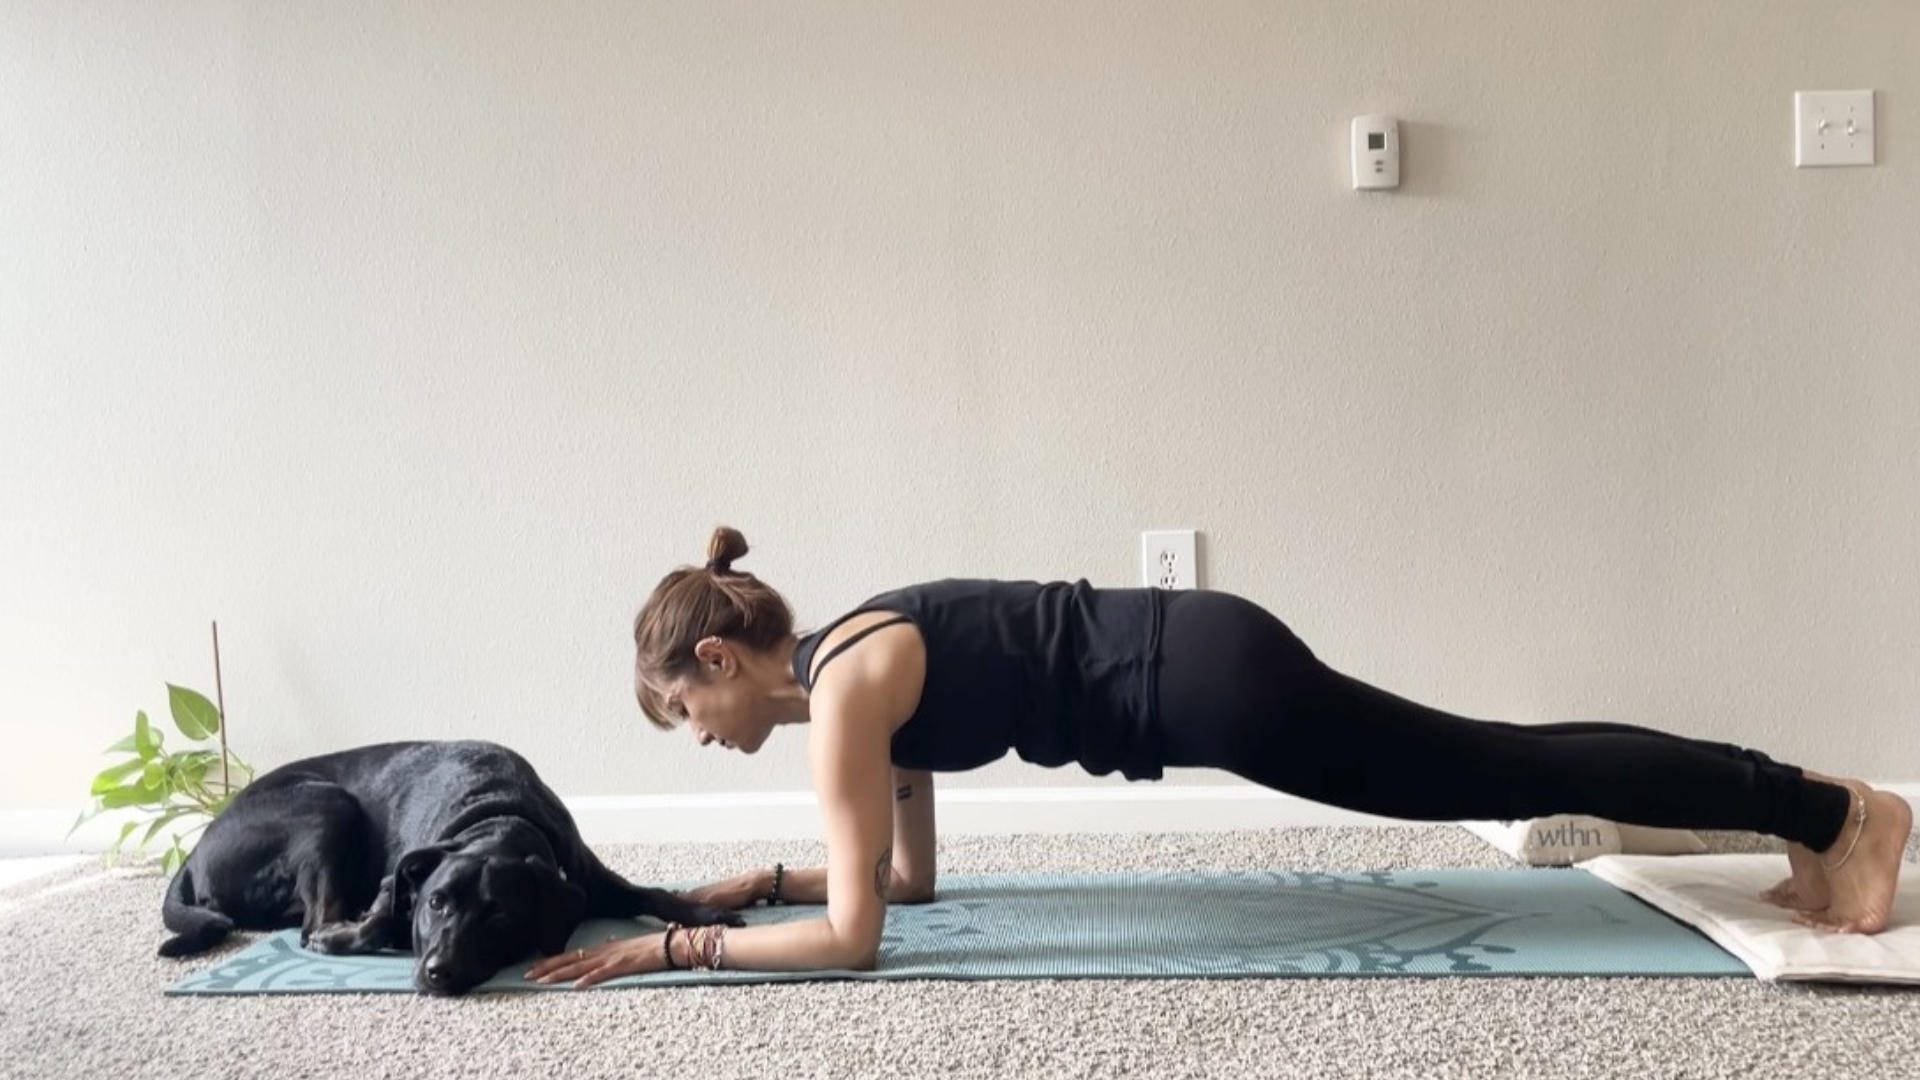
3. Forearm Plank
 (Photo: Anjana Rajbhandary)
When the shoulders and chest lack strength, the upper body tends to collapse slightly forward in weight-bearing poses such as Plank, increasing the demand on the smaller joints of the wrists. This exercise builds stability in the shoulder blades by training the shoulders to push “away” from the floor, known as shoulder protraction. In so going, it strengthens the upper body without taxing the wrists. It also provides an alternative to Plank if you are experiencing wrist discomfort, similar to how Dolphin can be practiced in place of Downward-Facing Dog.
How to: Lower down onto your forearms, stepping your feet back hip-distance apart to come into Forearm Plank. You can lower your knees to the mat to take more pressure off your wrists and forearms. Engage your core and as you exhale, press down into your forearms and spread your shoulder blades away from your spine, slightly rounding the space between the shoulders. Breathe here for 5–8 counts.
Focus on: Imagine pushing the floor away from your chest to create the sensation of an upward lift. Feel your shoulder muscles working to hold you in place. Remember this feeling, which is training your shoulders to sustain more of your body weight so your wrists don’t have to compensate.
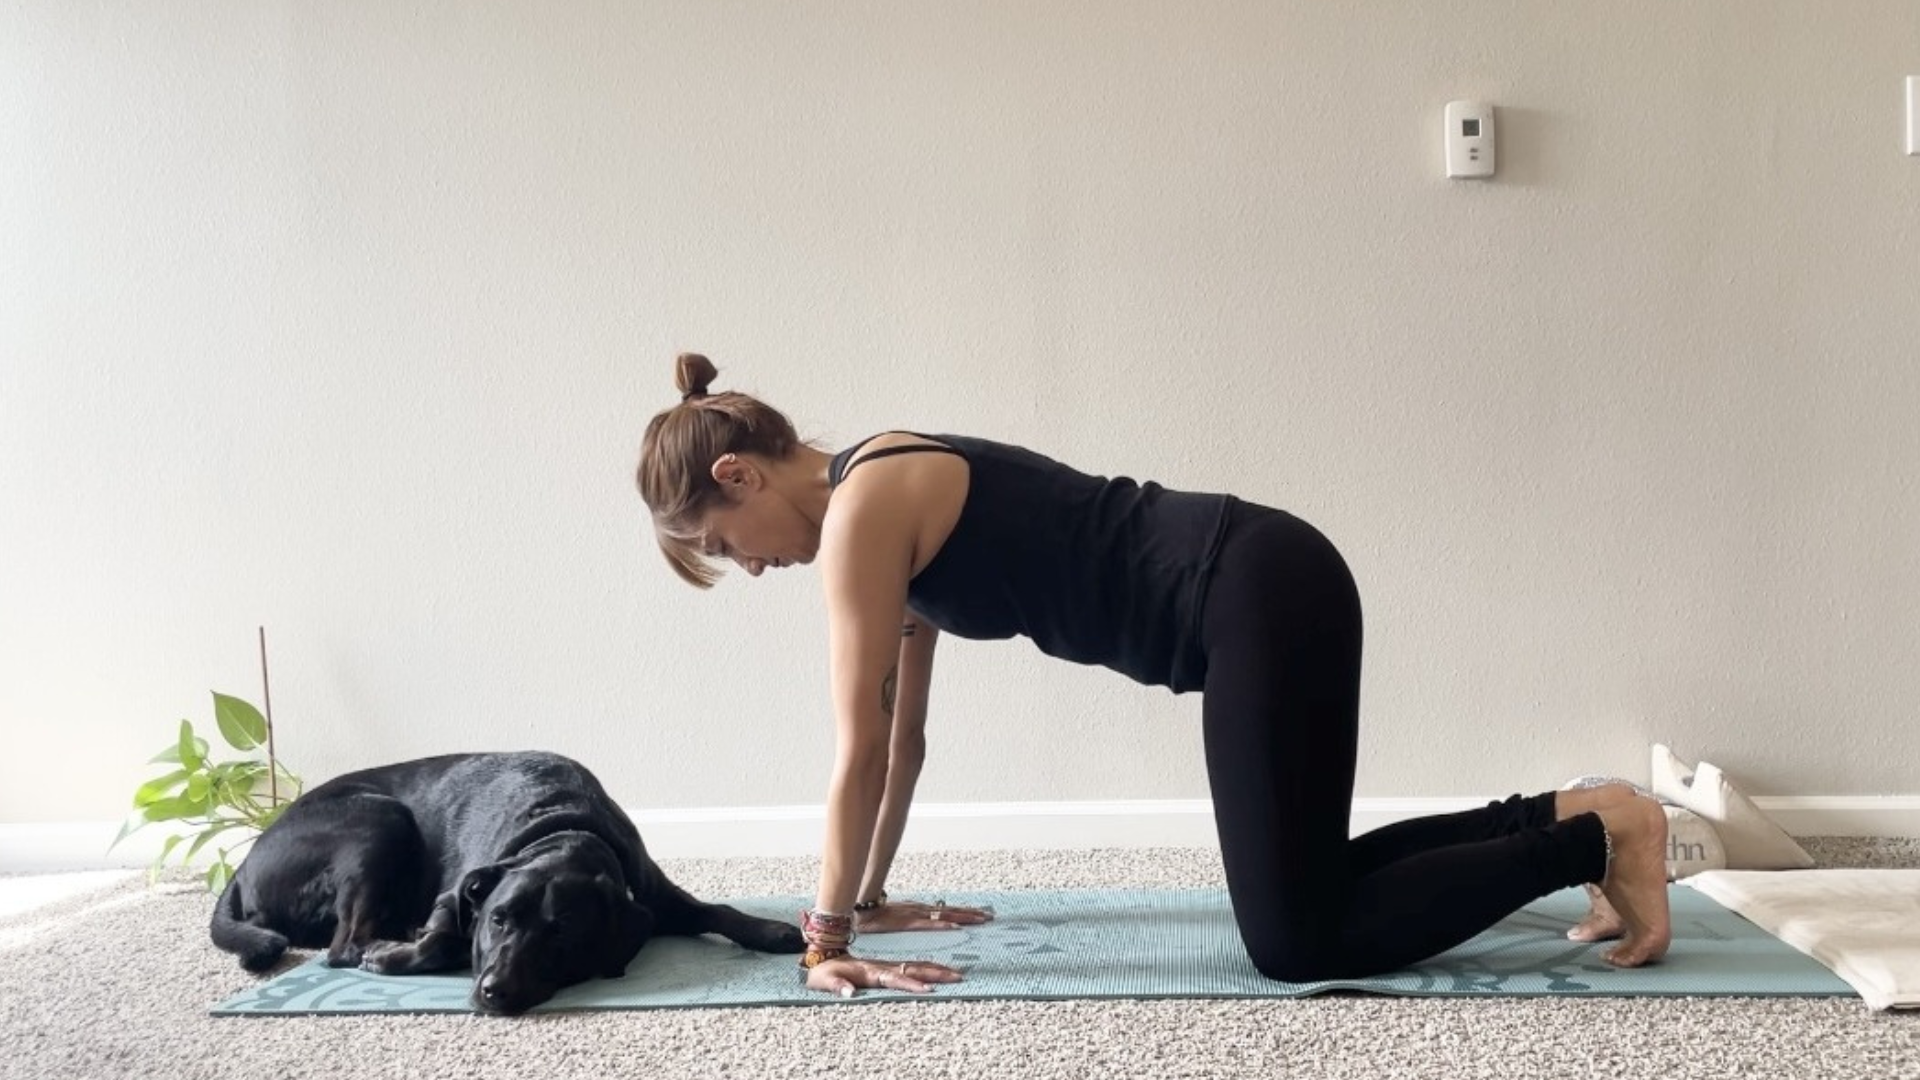
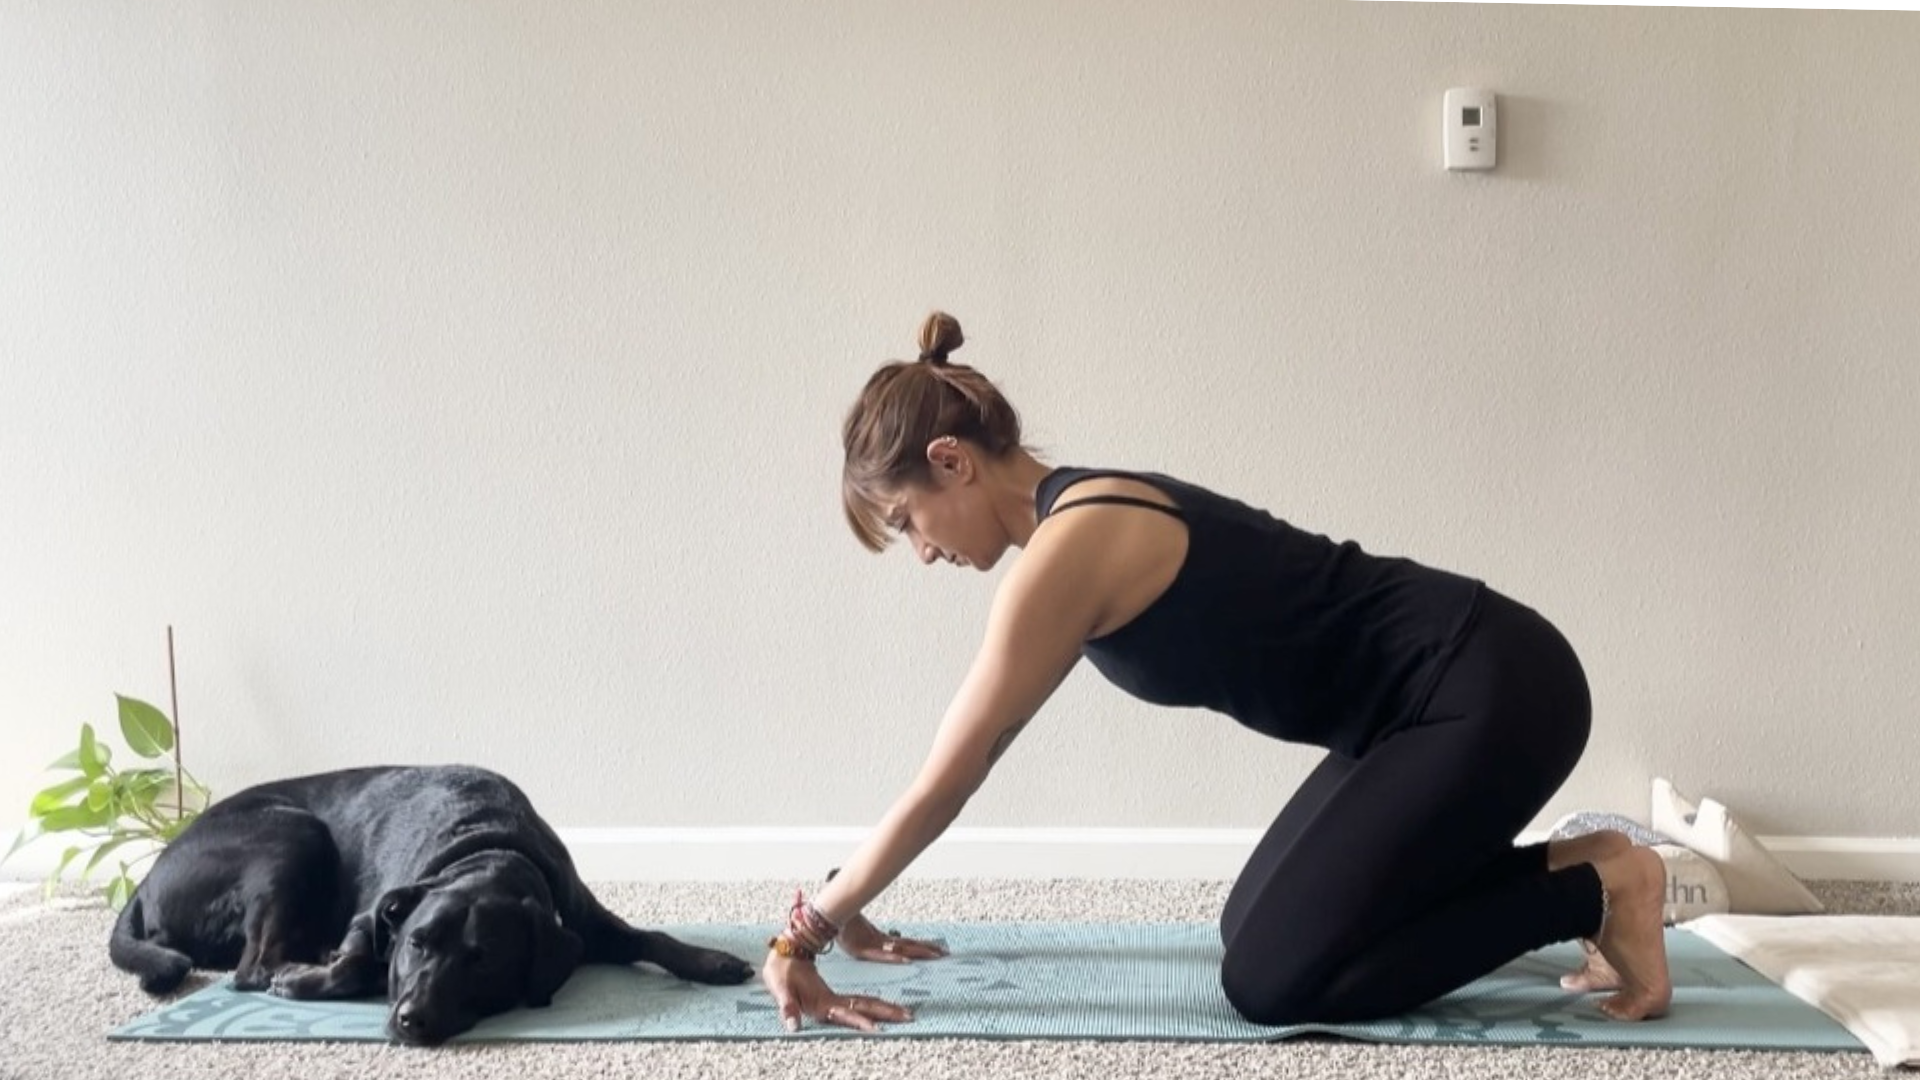
4. Flipped-Palm Pulses
 (Photo: Anjana Rajbhandary)
Typing on keyboards or smartphones for extended stretches of time stresses the wrist extensor muscles, which run along the backs of the forearms and help stabilize the wrists. This overuse keeps the muscles in near-constant contraction. The following exercise releases some of that tension by moving your wrists in the opposite direction and stretching the extensor muscles.
How to: From a kneeling or tabletop position, flip both hands over, one at a time, so the backs of the hands rest on the mat with your fingers pointing back toward your knees. Keep the arm straight but soft at the elbow. Apply gentle, pulsing weight down into the hand for 5–8 counts without placing all of your weight on your hands. Lean slightly backward to bring your hips toward your heels.
 (Photo: Anjana Rajbhandary)
Focus on: The slightly intense stretching along the tops of your wrists, backs of your hands, and backs of the forearms. Keep your movements small, slow, and gentle.
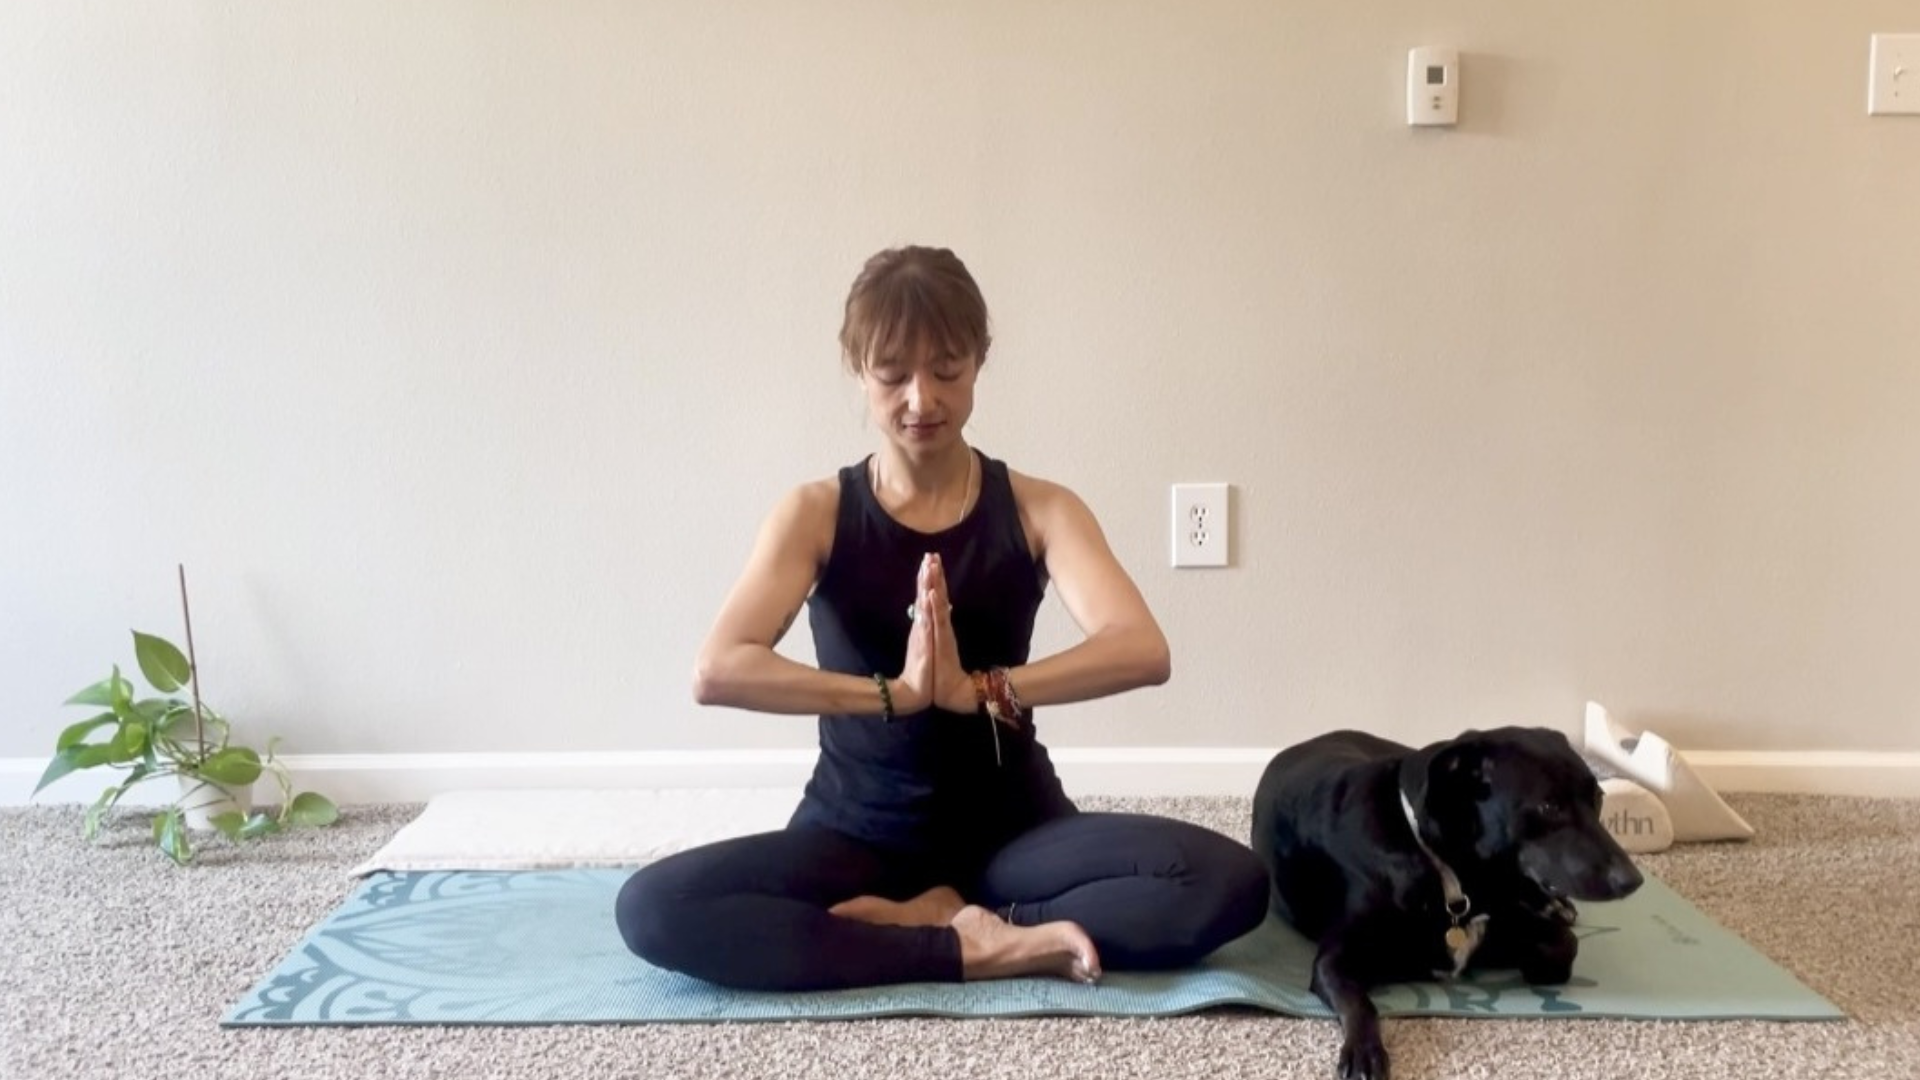
5. Isometric Hand-Pressing
 (Photo: Anjana Rajbhandary)
This exercise supports joint stability in the wrists through isometric contractions, which strengthens the muscles without shortening or lengthening them. It also strengthens the muscles of the hands, forearms, biceps, and chest.
How to: Sit comfortably in a cross-legged position. Bring your palms together in a prayer position at the center of your chest (Anjali Mudra). Inhale deeply to lengthen your spine and press your palms and fingers together as you exhale. Hold the squeeze for 5 seconds, then release. Repeat 5 times.
Focus on: Equal distribution of force from both hands. Make sure every single finger pad is actively pressing into its opposite finger. You want to feel the connection everywhere and not just at the base of the hands. Also feel for the muscular contraction through your wrists, forearms, biceps, and chest.
Let your practice lift you up instead of weigh you down by strengthening your wrists, because yoga isn’t meant to hurt but to heal you.









 English (US) ·
  French (CA) ·