
 2 weeks ago
11
2 weeks ago
11
PROTECT YOUR DNA WITH QUANTUM TECHNOLOGY
Orgo-Life the new way to the future Advertising by AdpathwayAuthor by Amanda Davis on May 15, 2026 Updated on May 15, 2026
These rock garden markers are easy to make and look so beautiful in the garden! In fact, for me anyway, painting rocks for the garden is very relaxing! Use your rock garden markers to identify herbs, vegetables, and flowers.

Painted Rock Garden Markers
I have made several garden crafts over the years, and I’m especially fond of making garden markers. Several years ago, I made these garden markers from smooth stones for my Chicago Tribune column. I’m really happy with how they came out and love all the different colors, and as you can see further down in the post, they last!
These garden markers would be beautiful inside your DIY wooden planter box!

It’s kind of like planting forever flowers to add a splash of color to an all green herb garden. Learning how to paint rocks is easy, and I’m going to tell you my favorite paint for rocks below.
Related – check out a ton more ideas for painted rocks!

This is a bit picture-heavy as I wanted to show you each marker in its environment… There is a picture-free printable version at the very end of this post.

Just in case you are wondering, I didn’t paint the bottom of the rocks. Two reasons for that: 1) why bother ha ha, and 2) all of DecoArt’s paints are non-toxic, but just to be safe from anything leeching into the soil I didn’t paint them. They won’t be seen anyway.

I can’t wait to see how they do over the winter too.. (see next pic and description).
Painted Rocks vs. the Elements
Many have asked how these survived outside in the rain and snow and ice. This picture shows them after two winters outside. This is without me giving them any additional coats of clear or anything. They have held up beautifully considering. You can see that the purple one has a couple nicks, that’s from falling off the edge and onto my driveway I believe. That’s where I found it anyway! :-/
These garden markers have been outside since the first week of June (2013!) and have been subjected to daily watering and quite a few rainstorms. They still look just as good as they did when I first put them out there.
What you will need to make painted rock garden markers
Find the full printable instructions and materials list at the end of this post.

PAINT – I used Patio Paint for these, which is specifically formulated for outdoor projects as well as Patio Paint clear coat. These are one of the best paints for rocks, especially if they will remain outside.
MARKERS – I wrote the names with DecoArt glass paint markers. You can also use a Sharpie if preferred.
Other Materials Needed
- Smooth rocks – To make these garden markers you will need some smooth stones. You can find them in your yard or garden, or you can buy a bag from the craft store.
- Paintbrushes
- Pencil or toothpick

I know that many people like to leave their markers out so they know where their perennials will come up each spring. As you can see from the update above, they survived great. I would definitely recommend sealing them each year though, for added protection.


How to make painted rock garden markers
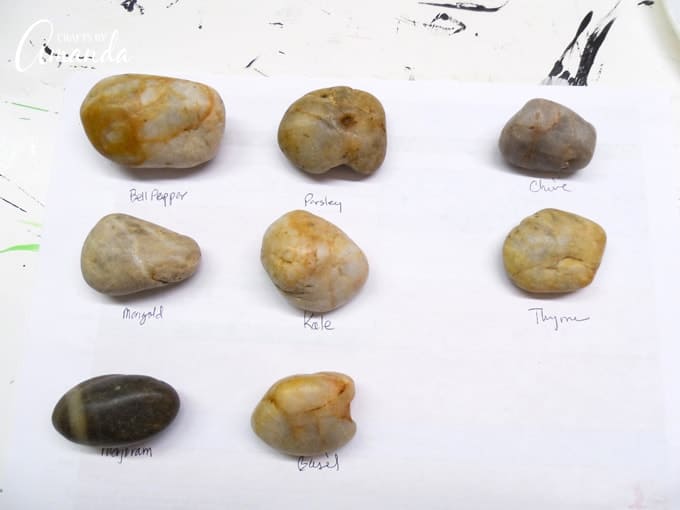
- I used a piece of paper to map out which rocks to use for each plant. Obviously, some plants will require a larger rock because of the number of letters in its name, so it’s a good idea to plan that ahead of time.

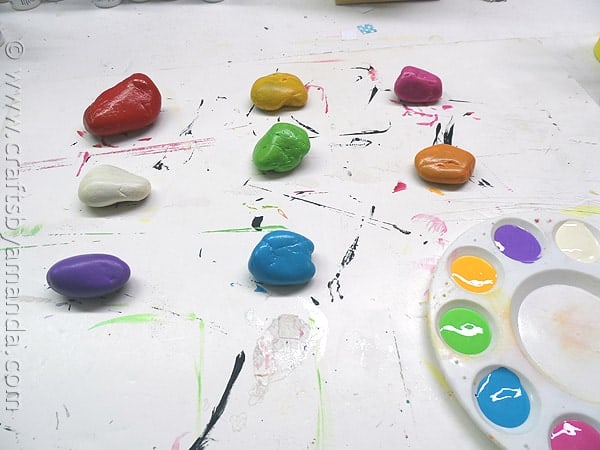
- Paint the top of each one with Patio Paint, let them dry, and paint a second coat. Don’t paint the bottoms as they will be touching the earth. Notice that I placed the painted rocks on the foam board in the same order that I had them on the paper I used to map them out.
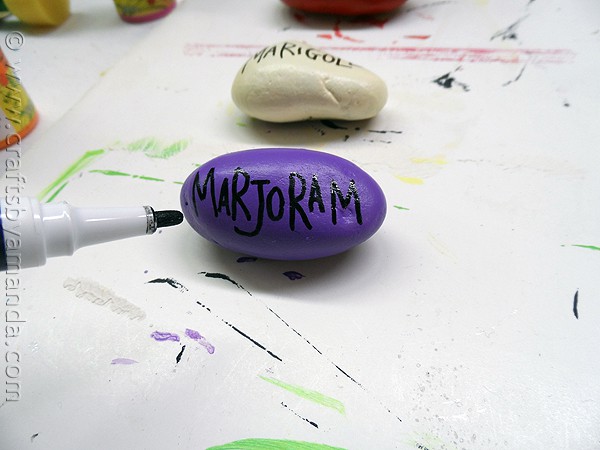
- To write the plant names on the rocks, I used DecoArt glass paint markers because they are my favorite, but you could also use a Sharpie. HOWEVER, if you use a Sharpie, please be sure to allow the Sharpie to dry for a good hour before adding the clear coat over the top. Sharpies are notorious for bleeding.
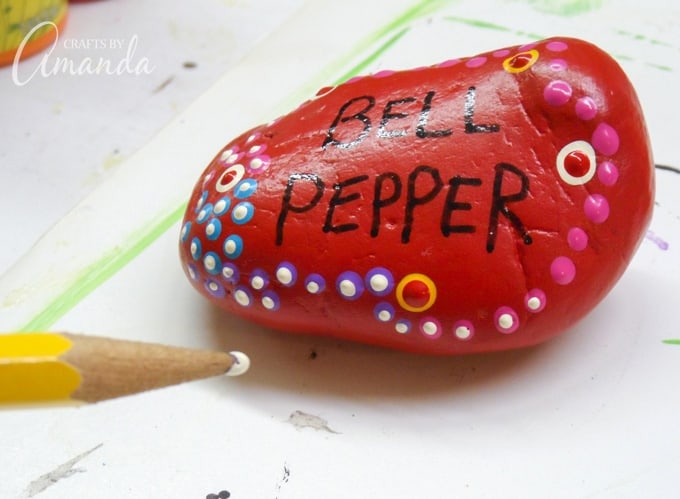
- To decorate, use the handle end of a large craft paintbrush to dot on various spots in different colors. Use a smaller paintbrush handle to add smaller spots.

- Finally, use the tip of a pencil or a toothpick to add tiny white dots to the center of the larger dots. Allow the rocks to dry for 2-3 hours. Apply Patio Paint clear coat and allow them to dry overnight.


More Garden Crafts
- Birdy Flower Markers
- Beaded Garden Sparkler
- Herb Garden Sign
- Recycled Key Plant Markers
- Make a Fairy House
- DIY Garden Stepping Stones
Painted Rock Garden Markers
Colorful painted make perfect garden markers! Great for your flowers, herbs, and vegetables. Great gift idea too!
Supplies
- Smooth rocks
- Patio Paint or outdoor craft paint in various colors
- Black paint marker or Sharpie
- Paintbrushes
- Pencil or toothpick
- Patio Paint clear coat or clear outdoor sealer
Instructions
Wash the rocks and dry them thoroughly. It may be necessary to let them sit for an hour or so as rocks are porous and can absorb water.
Which rocks you use with depend on what you have growing in your garden. For example, you will need a longer or larger rock for “marjoram” than you will for “kale” as there are more letters to fit on the rock. You can use a piece of paper to map out what rocks will get what names.
Paint the rocks in desired colors. For the longest life of your plant markers, it’s important to allow adequate drying time; allow at least 1 hour between coats. Some colors may need more coats than others in order to cover.
Once your rocks are painted and dry, use a black paint pen or Sharpie marker to write the names of your plants on each rock.
To decorate, use the handle end of a large craft paintbrush to dot on various spots in different colors. Use a smaller paintbrush handle to add smaller spots.
Finally, use the tip of a pencil or a toothpick to add tiny white dots to the center of the larger dots. Allow the rocks to dry for 2-3 hours.
Apply a clear coat and allow them to dry overnight.
This post was originally published on this blog on July 27, 2013.
Amanda Davis is the crafty, entrepreneurial mother of four children. She loves to bake, cook, make kid's crafts and create decorative items for her home. She is a crafting expert and guru in the kitchen and has appeared online and in print publications many times over the years.
Latest posts by Amanda Davis (see all)


 English (US) ·
  French (CA) ·